

Work tickets on the board and table
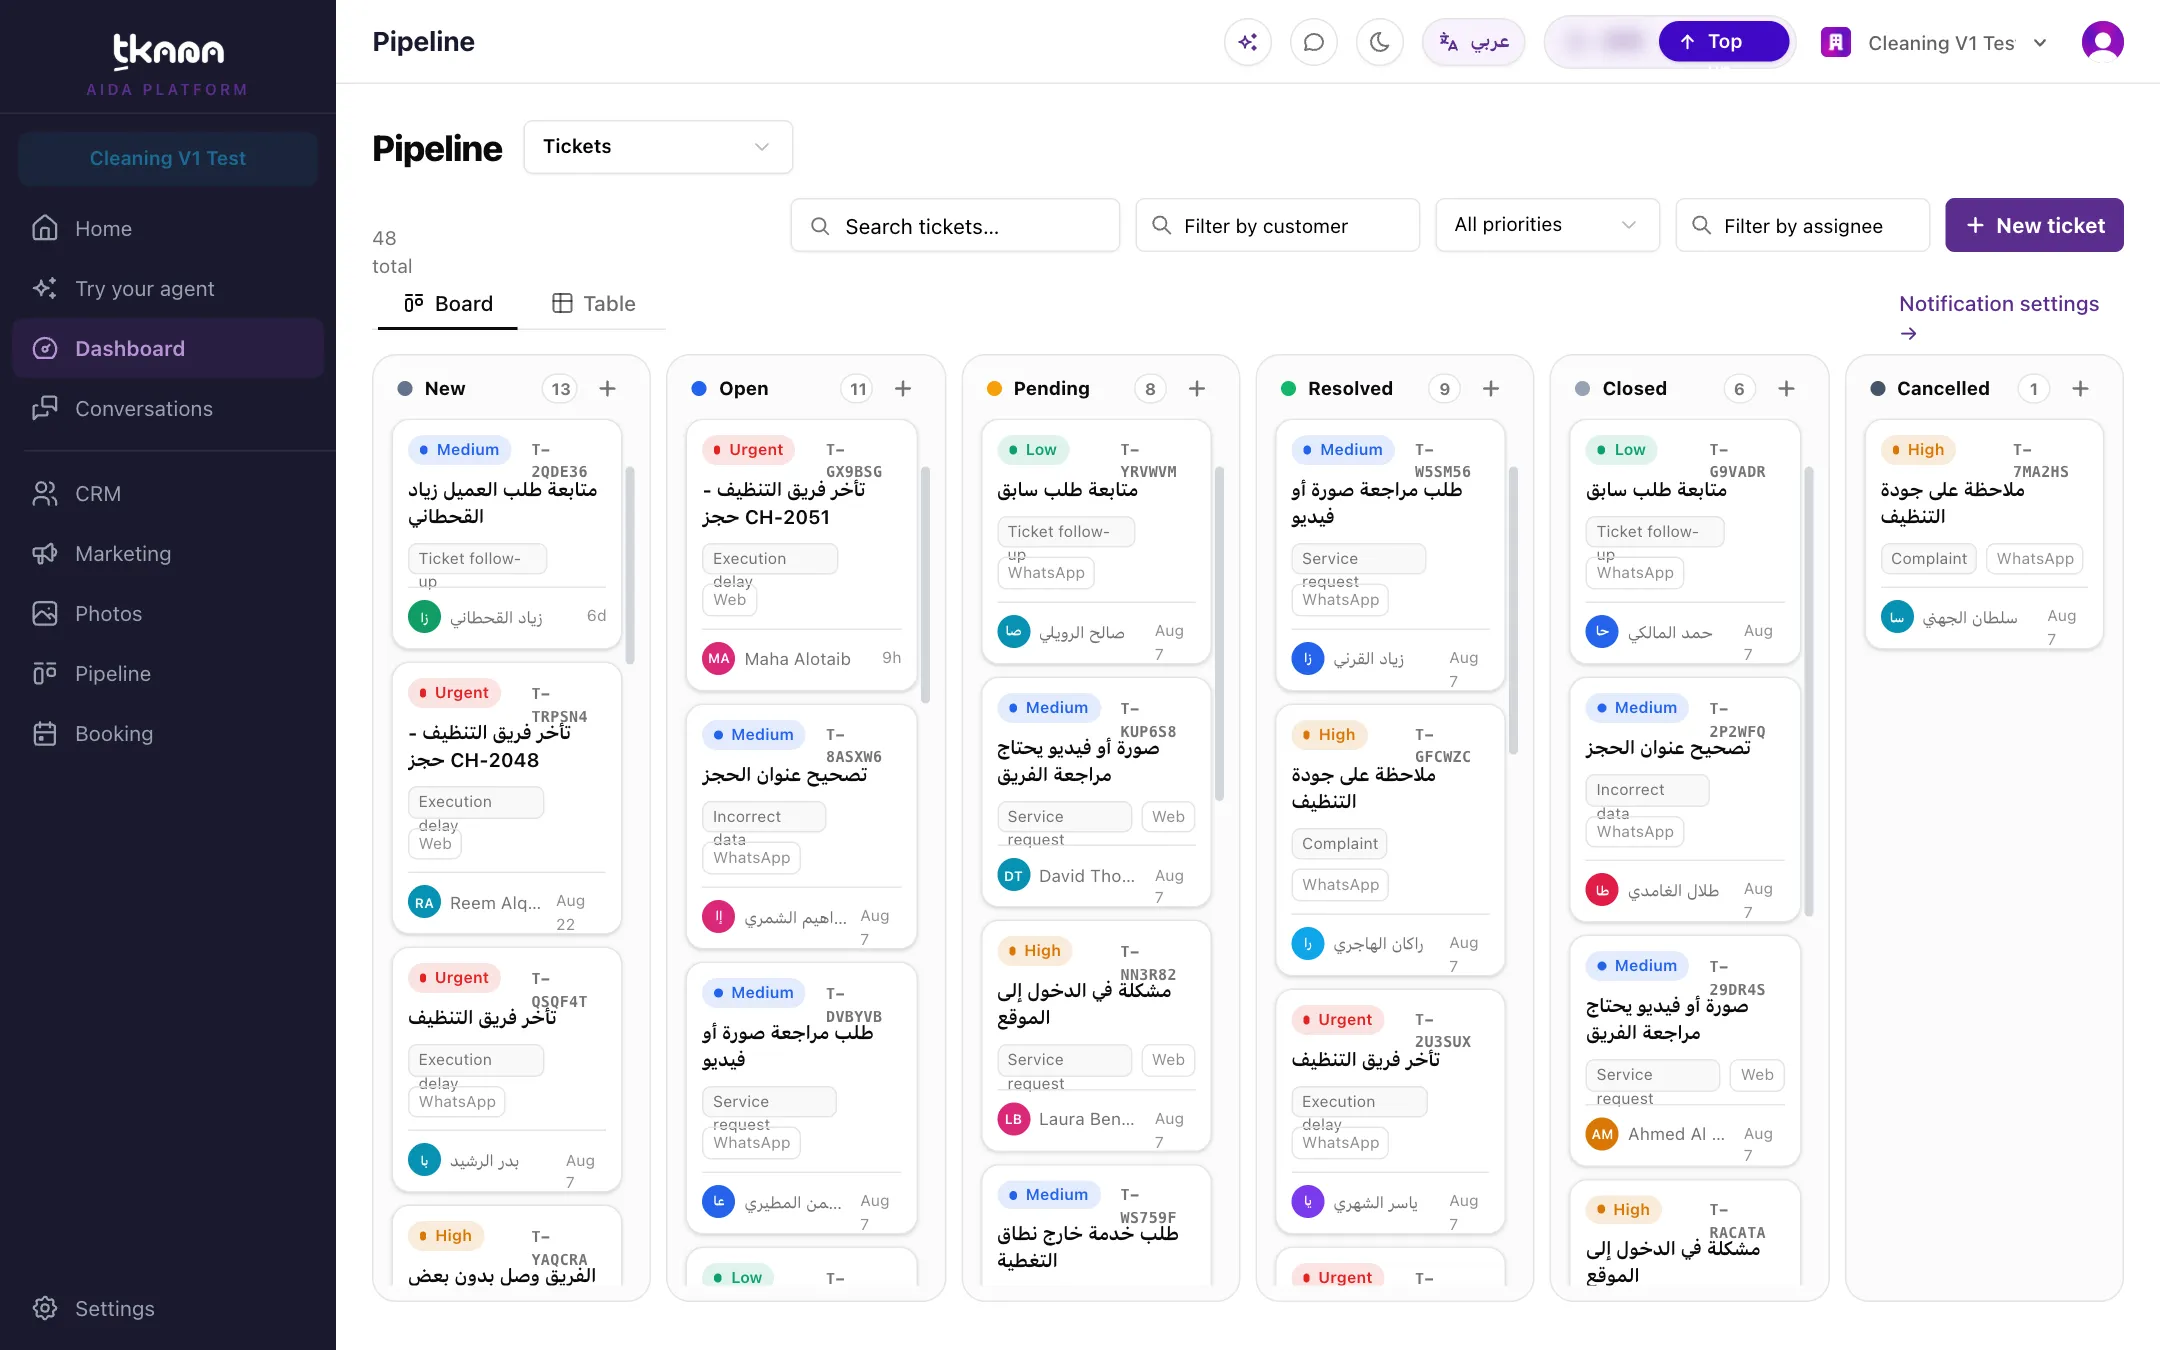
Your team works tickets from the Pipeline page in the sidebar. Choose Tickets from the type list next to the page title, and your tickets show in two ways:
- Board: one column per stage, where you drag cards from stage to stage. This is the default view.
- Table: sortable rows you can page through.
Ticket stages
Section titled “Ticket stages”| Stage | When to use it |
|---|---|
| New | The ticket arrived and nobody has started on it. |
| Open | Someone on your team is working on it. |
| Pending | You are waiting for a reply or information from the customer. |
| Resolved | The request is done, with a resolution message. |
| Closed | Follow-up on the ticket is finished. |
| Cancelled | The request was cancelled and will not be carried out. |
Move a ticket between stages
Section titled “Move a ticket between stages”Drag the card and drop it in the column you want. A ticket can move from any stage to any other.
- Moving an unassigned ticket assigns it to you.
- Moving a ticket assigned to a colleague keeps it assigned to them.
- Dropping into Resolved opens the Resolve ticket window. Describe how the request was solved in Resolution message, then click Resolve.
Open a ticket’s details
Section titled “Open a ticket’s details”Click any card or row to open the details panel. It shows:
- Description, Customer, category, channel, priority, Request #, and who created the ticket and when.
- Assignee: pick someone under Team members, one of your AI agents, or Unassigned.
- Attachments: the photos and files the customer sent on WhatsApp with their request. Photos show as thumbnails; click any attachment to open it. Opening them only needs permission to view tickets, not conversations. If the customer’s data was erased, the attachment reads No longer available.
- Conversation: a summary of the conversation the ticket came from, with a View conversation link.
- Resolution: the resolution message, with Add resolution or Edit resolution.
- Comments: internal notes for your team. The customer never sees them and they are not sent anywhere.
- Activity: a history of every change to the ticket and who made it.
To change the subject, description, category, or priority, click Edit. To remove the ticket, click Delete and confirm.
Search and filter tickets
Section titled “Search and filter tickets”At the top of the page:
- Search looks through the subject, description, request number, and category.
- Priority, Assignee, and Customer filters work on both the board and the table.
- Status is available on the table only, since the board already shows each status as its own column.
The page keeps your filters in its link, so you can bookmark a filtered view and share it with teammates.
Create a ticket yourself
Section titled “Create a ticket yourself”-
Click New ticket.
-
Choose the Customer. The customer must already exist in CRM.
-
Type the Subject, choose the Category, Priority, and Channel, and add a Description.
-
Click Create.
A ticket you create is credited to you, and it also appears on the customer’s record in CRM.
Next steps
Section titled “Next steps”Was this article helpful?
Thanks for the feedback, it helps us improve these guides.