

Notification settings explained
Settings > Notifications is the one page that controls every automated message tkana sends for you: messages to your customers, such as a booking confirmation, and emails to your team, such as “a new ticket came in”. This article walks through the page. To learn which messages each skill sends, see Understand automated messages.
How the page is organized
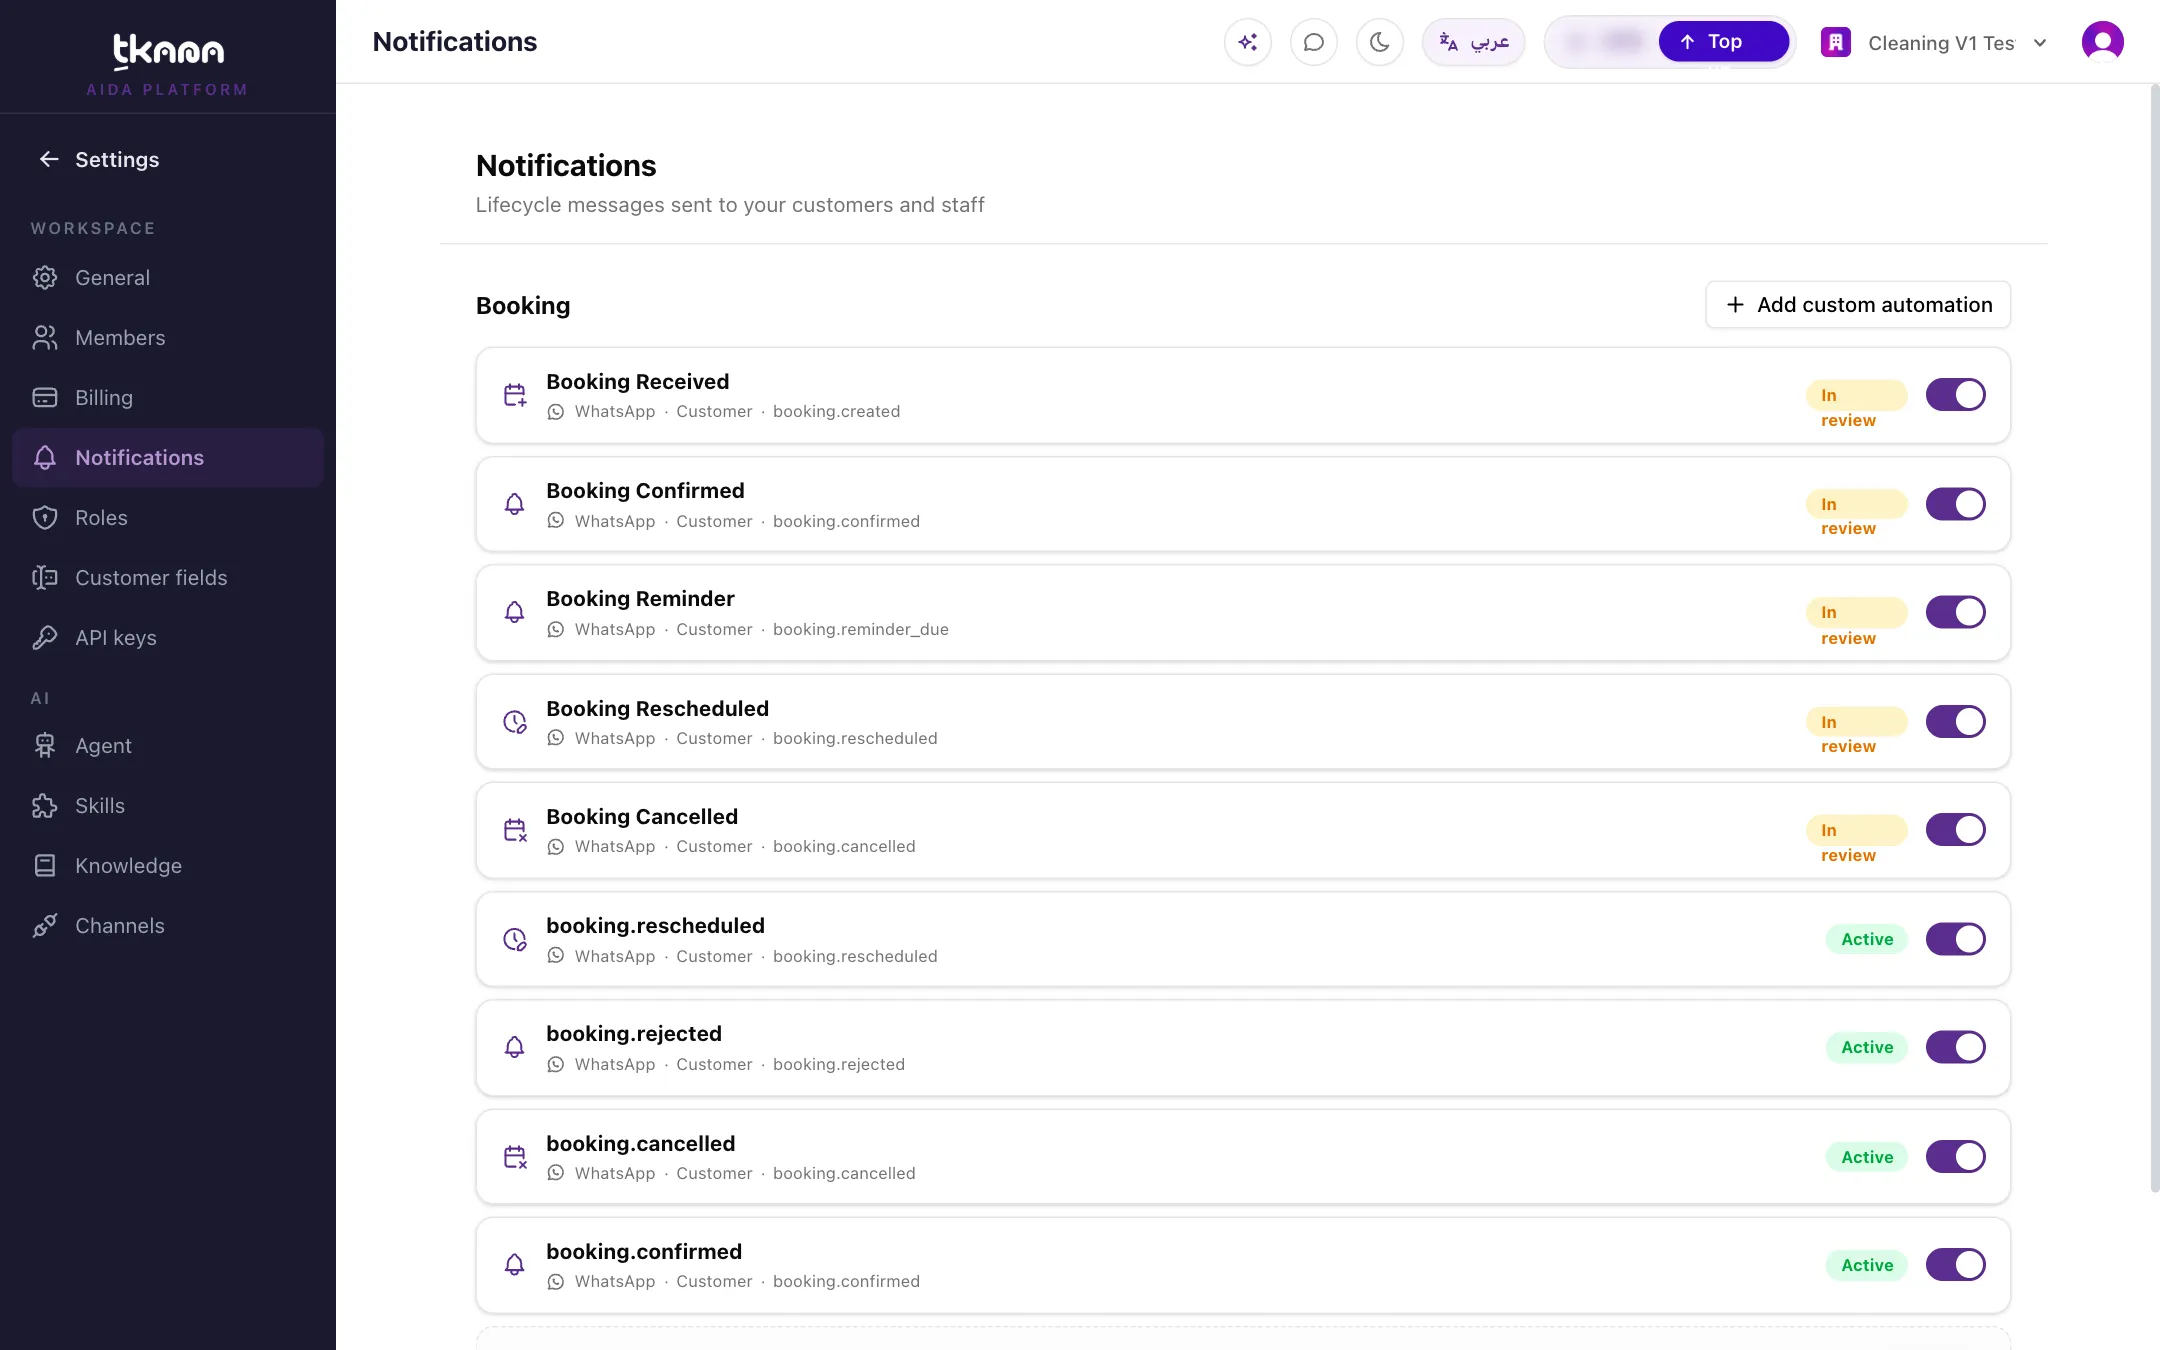
Section titled “How the page is organized”In Settings, open Notifications. Messages are grouped by the skill that sends them:
- Booking: appears when a booking skill is installed.
- Ticketing: appears when the Support tickets skill is installed.
If you see No notification-enabled skills installed yet., install the Booking or Ticketing skill from Settings > Skills first.
Each row is one event for one audience, and shows:
- Who receives it: Customer or Staff.
- The channel: WhatsApp or Email.
- Its status (see the table below).
- A switch to turn the message on or off, and actions such as Edit message.
Turn a message on or off
Section titled “Turn a message on or off”Use the switch on the message’s row. A message that is off is not sent until you turn it back on. Built-in messages cannot be deleted, only switched off.
Reword a message
Section titled “Reword a message”-
Click Edit message on the message’s row.
-
Edit the text in the Arabic and English tabs. Placeholders, such as the customer’s name or the booking time, are locked, but you can change the text around them.
-
Click Save & resubmit.
Message statuses
Section titled “Message statuses”| Status | What it means |
|---|---|
| Approved or Active | The message is ready and goes out when the event happens. |
| In review | Waiting for Meta’s approval. |
| Pending connection | Not submitted for review yet, because no WhatsApp number is connected. |
| Setting up | The message is being prepared. |
| Rejected | Meta turned it down, and the reason is shown. Click Fix & resubmit. |
| Off | You turned it off with its switch. |
| Not set up | The message is not prepared yet. Click Set up. |
Where your team’s emails go
Section titled “Where your team’s emails go”Staff rows send an email to your team. Where that address comes from depends on the row:
- Built-in staff emails, such as the new booking or new ticket email, go to the address you entered when you set up the skill. To change it, open the skill in Settings > Skills and update its settings.
- Custom staff emails you added yourself go to the address in Send to. If one has no address yet, click Set recipient on its row, enter the email, and click Save.
Add your own message
Section titled “Add your own message”You can add a simple message of your own on a booking or ticket event, to the customer or to your team:
-
In the group you want, click Add custom automation.
-
Choose the Trigger event, such as Created, Rescheduled, Cancelled, or Resolved.
-
Choose the Channel (WhatsApp or Email) and who to Notify: Customer or Staff. For your team, enter the email address in Send to.
-
Write the Message, then click Save.
To remove a custom message you added, click Delete on its row.
Who can change notifications
Section titled “Who can change notifications”What you can change here depends on your role. Editing and switching messages needs permission to update notifications, and deleting a custom message needs permission to delete them. Ask your account owner if a button is missing.
Related
Section titled “Related”Was this article helpful?
Thanks for the feedback, it helps us improve these guides.