

Label your conversations
Labels help your team sort conversations at a glance, for example “Urgent”, “Follow-up”, or “Complaint”. A label belongs to a conversation, so you can mark one conversation without affecting the customer’s other conversations.
Add a label to a conversation
Section titled “Add a label to a conversation”-
Open the conversation in Conversations.
-
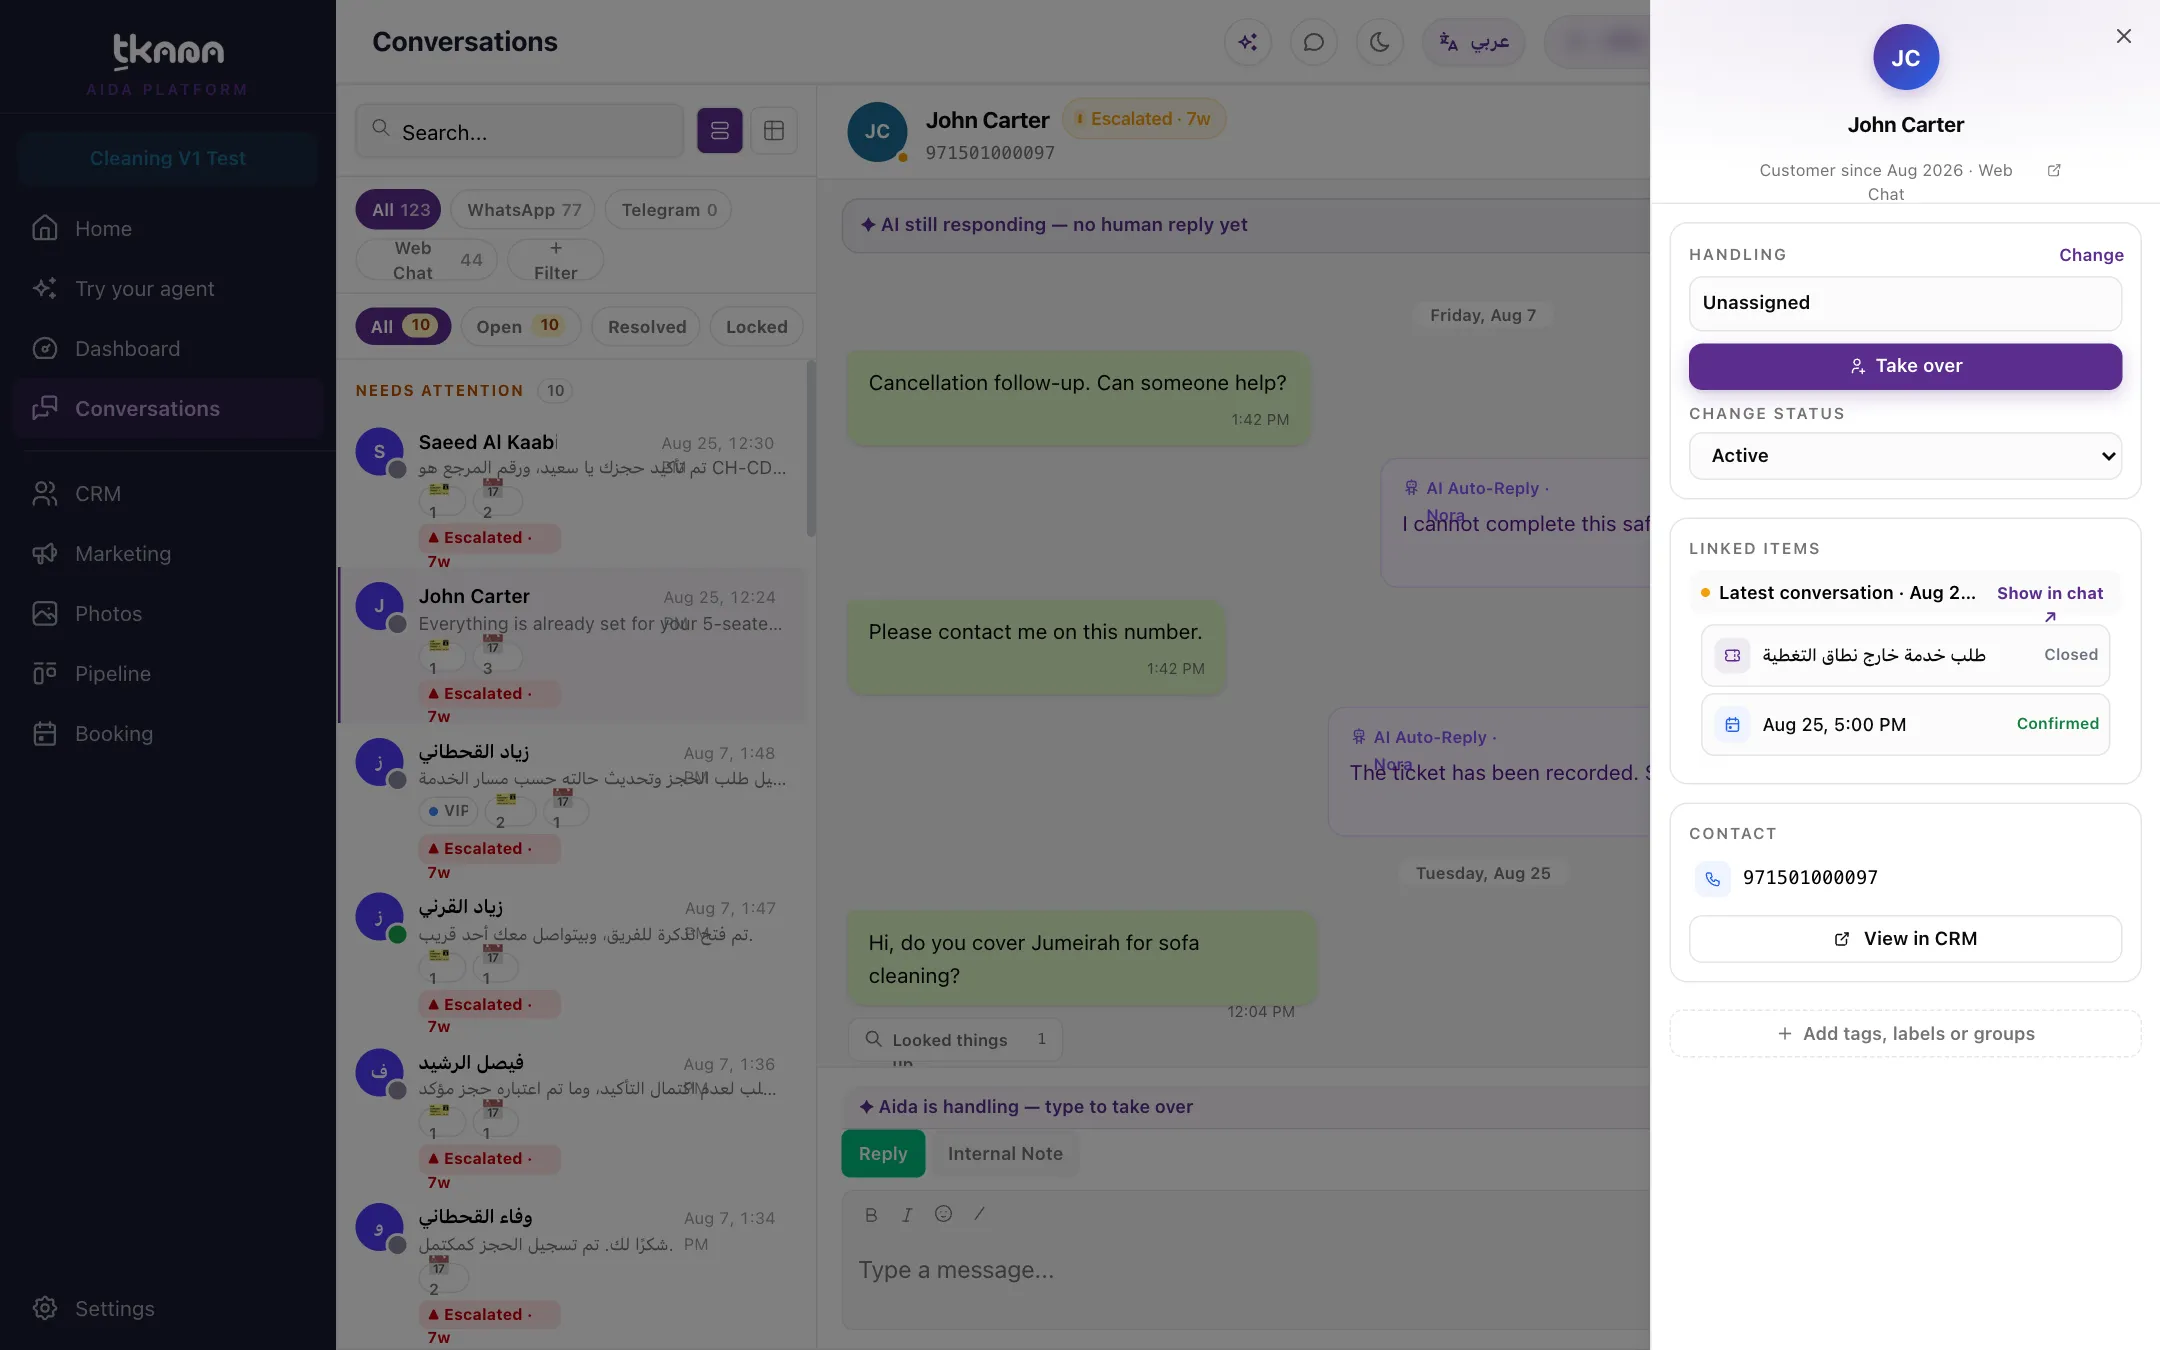
Click Details (the arrow button in the conversation header) to open the details panel.
-
At the bottom of the panel, click Add tags, labels or groups.
-
Next to Labels, click the + button. The list of your labels opens.
-
Click a label to add it. A check mark shows the labels already on the conversation.
The labels appear under Labels in the details panel, and on the conversation’s row in the list.
Create a new label
Section titled “Create a new label”You create labels from the same list:
-
Open the labels list as above.
-
Under Create label, type the label’s English name… and Arabic name…. If you fill in only one, it is used for both languages.
-
Pick a color.
-
Press Enter or click the + button. The label is created and added to the conversation.
Your labels are shared by your whole team, so everyone can apply the same ones.
Remove a label
Section titled “Remove a label”Click the label in the details panel to remove it from the conversation. You can also open the labels list and click a checked label to uncheck it.
Removing a label from a conversation does not delete the label. It stays available for other conversations.
Filter your inbox by label
Section titled “Filter your inbox by label”-
On the Conversations page, click Filter.
-
Choose Label, then pick a label. Label appears in the menu once you have created at least one label.
The list now shows only conversations with that label. To clear the filter, click the Label chip above the list.
Related
Section titled “Related”Was this article helpful?
Thanks for the feedback, it helps us improve these guides.