

Set up your services and resources
Every time slot your agent offers comes from two things you set up in the portal:
- A service is what a customer books, for example “Deep cleaning” or “Consultation”. It has a duration and a price.
- A resource is the staff member or room that delivers the service. It has a weekly schedule that decides when it can be booked.
Open Booking from the sidebar. The page has three tabs: Calendar, Resources, and Services.
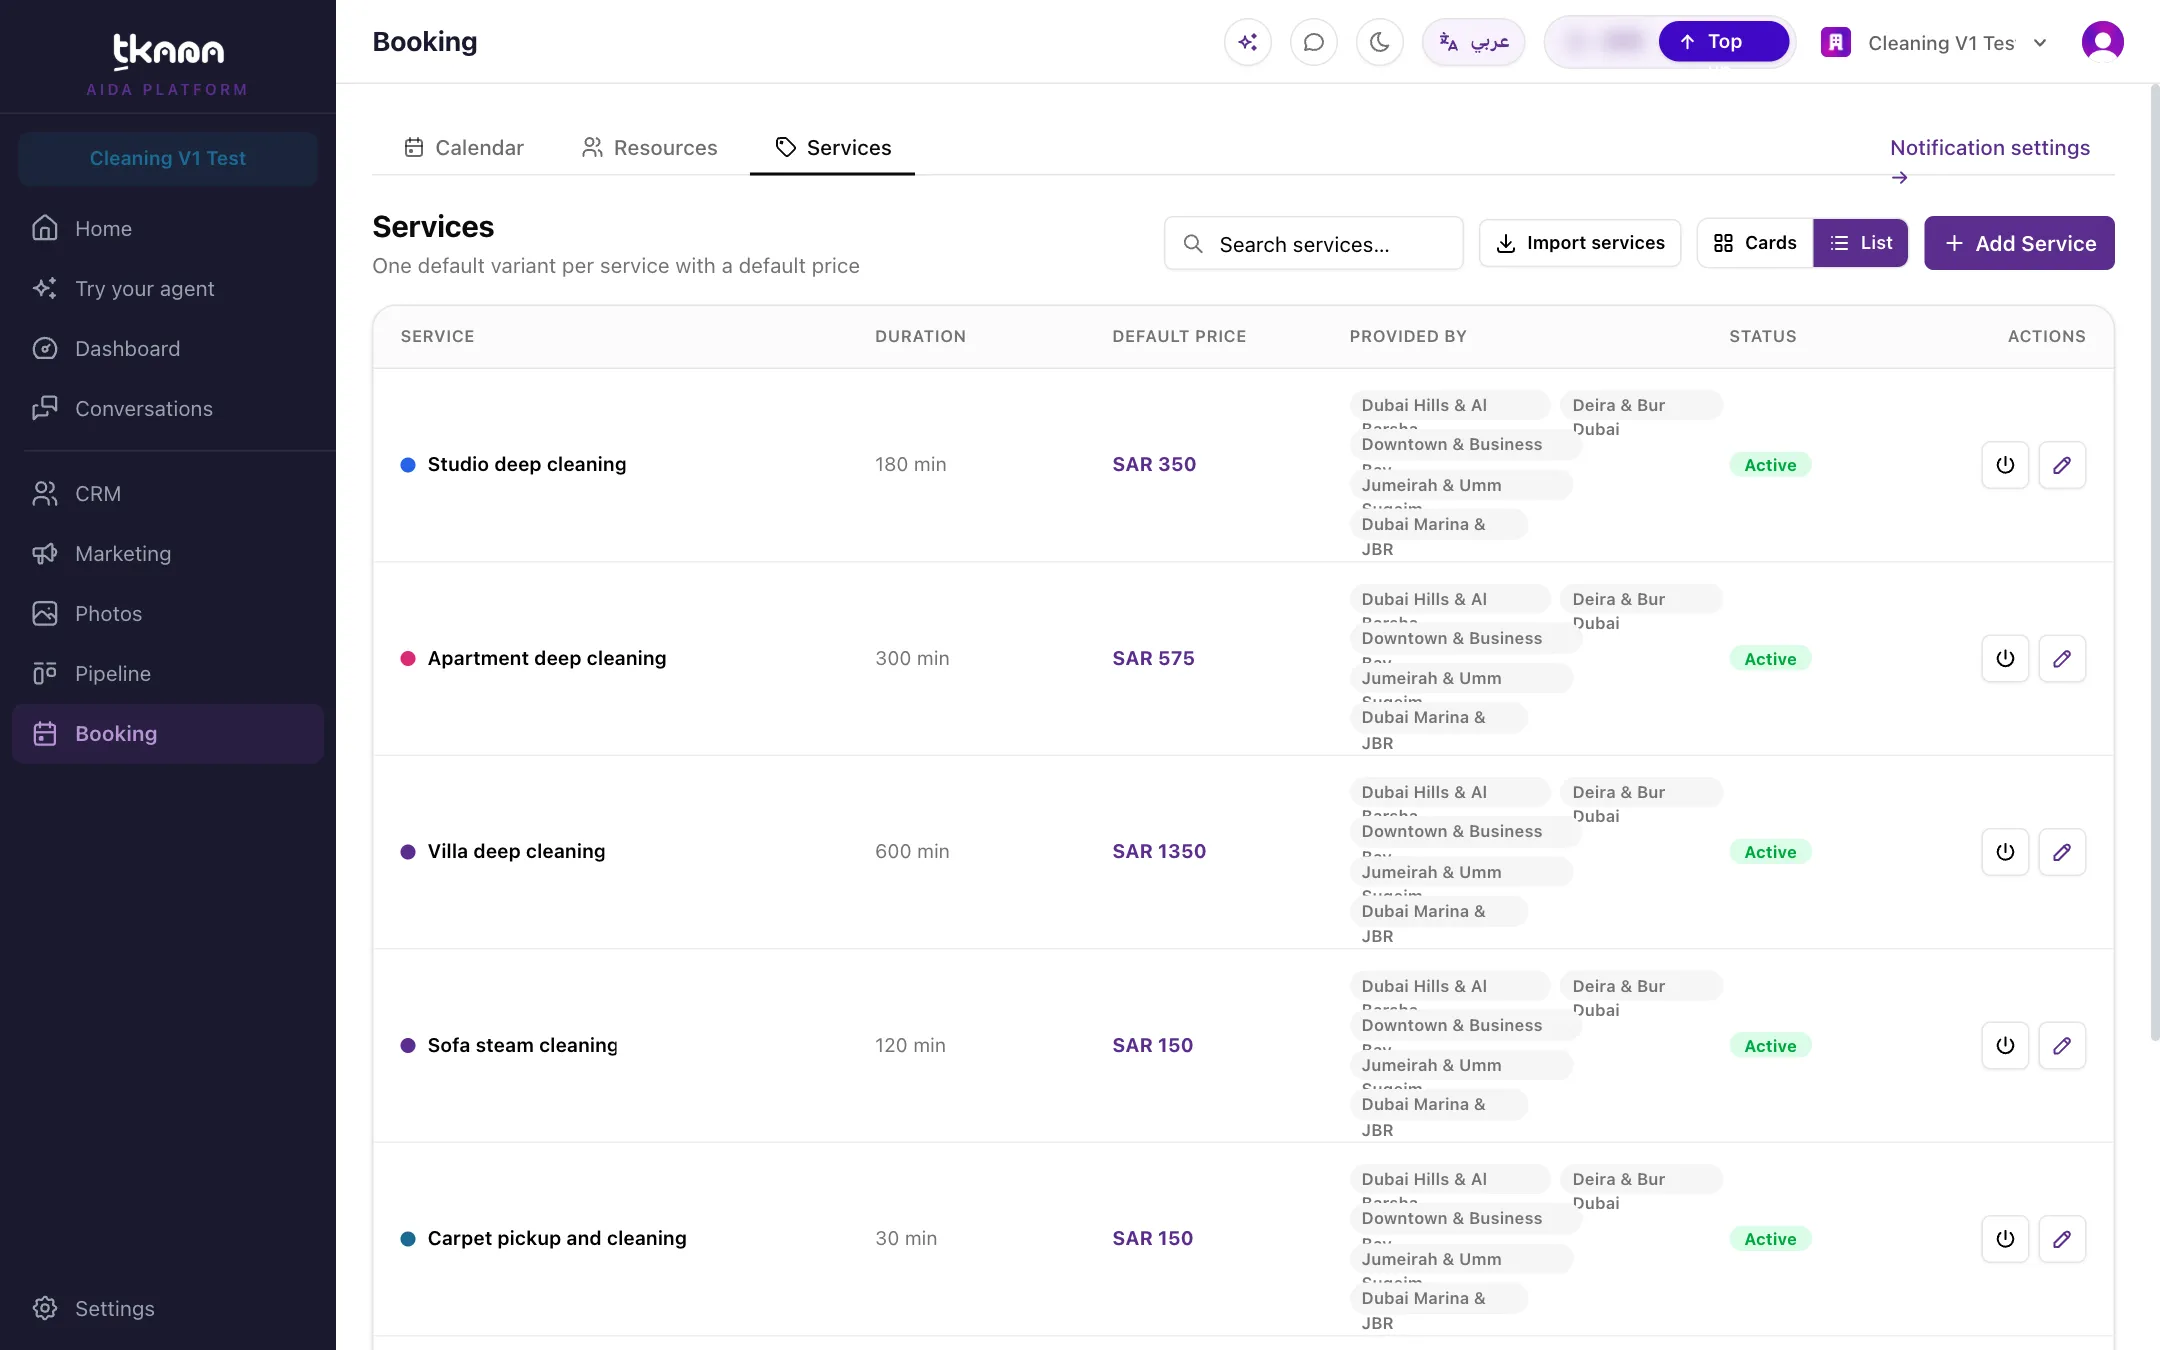
Add a service
Section titled “Add a service”-
Open the Services tab and click Add Service.
-
Fill in the service details:
- Name (EN) and Name (AR): the name customers see in each language.
- Duration: how long one appointment takes.
- Default Price: the price in SAR. Leave it at zero for a free service.
- Color: helps you tell services apart on the calendar.
- Needs manual confirmation: turn this on if you want to approve each new booking yourself. New bookings for the service then start as Pending until you confirm them. When it is off, bookings are Confirmed straight away.
- Provided by: pick the resources that deliver this service.
-
Save the service.
Add a resource
Section titled “Add a resource”-
Open the Resources tab and click Add Resource.
-
Enter a Name and a Role, for example “Therapist”, “Stylist”, or “Room 2”.
-
Fill in the Weekly schedule. For each day, add the hours the resource works, or mark the day as Day off. You can add more than one block of hours on the same day, for example a morning and an evening shift. Use Copy to other days to reuse one day’s hours.
-
Under Services provided, pick the services this resource delivers.
-
Optionally, set Assigned to to a team member. That person’s bookings and alerts are then tied to this resource.
-
Save the resource.
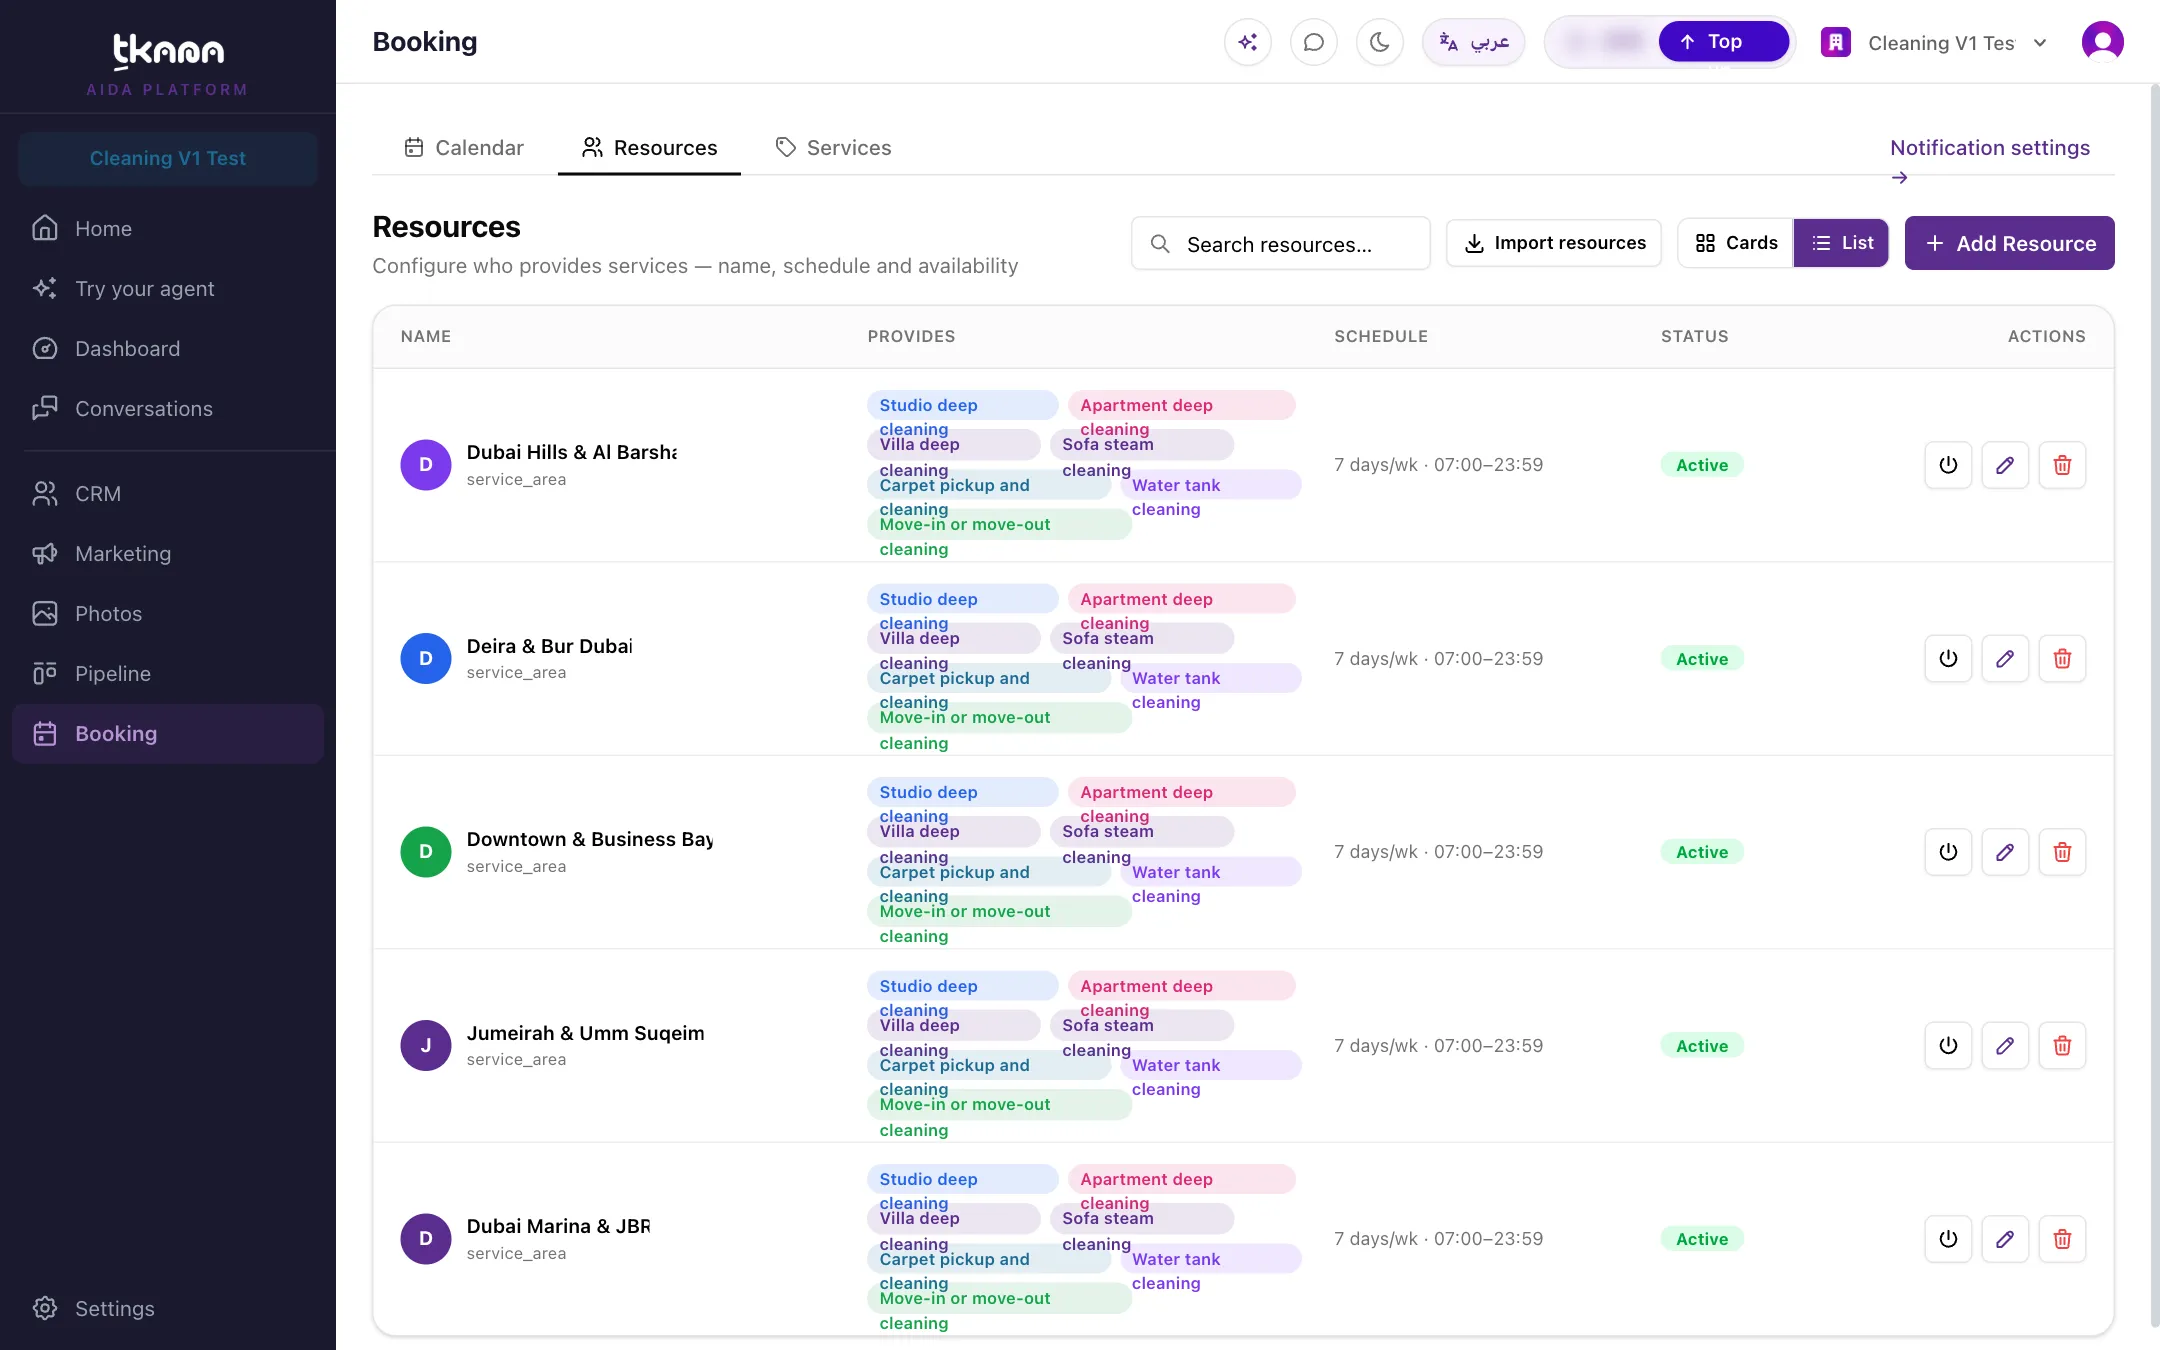
Limit a resource to certain dates
Section titled “Limit a resource to certain dates”If a resource is only available for a set period, for example a visiting specialist, open Booking horizon in the resource form, choose Fixed window, and set the From and To dates. Customers can only book it inside that window.
Import services and resources from a price list
Section titled “Import services and resources from a price list”Already have a price list, a services page on your website, or a staff list? You can import it instead of typing each item.
-
On the Services tab click Import services, or on the Resources tab click Import resources.
-
Choose where to import from: Paste text, Website URL, or Upload file (PDF, spreadsheet, Word, or plain text). You can also download a ready-made spreadsheet template.
-
Click Extract. Reading your source can take a minute. You can close the window and come back; the import keeps running.
-
In Review what we found, correct anything that is not right, choose the items you want, and click Import selected.
Switch a service or resource off
Section titled “Switch a service or resource off”Use Deactivate to stop new bookings for a service or resource without losing its history, for example while a staff member is on leave. Existing bookings stay as they are. Click Activate to take bookings again.
A resource that already has bookings cannot be deleted, because deleting it would remove that booking history. Deactivate it instead.
Settings you cannot change in the portal
Section titled “Settings you cannot change in the portal”Some rules can be set for each service but are not in the service form yet: a buffer before or after each appointment, the minimum notice a customer must give, and how far ahead a service can be booked (60 days by default). Contact tkana support if you need to change any of these.
Was this article helpful?
Thanks for the feedback, it helps us improve these guides.