

Connect your systems with the tkana API
If you have your own systems, such as a website, a CRM, a helpdesk, a booking system, or a reporting tool, you can connect them to your tkana account in two ways:
- The API: your system reads, adds, or updates data in your account with an API key. It covers customers, conversations and their messages, tickets, bookings, services and their open slots, and sending WhatsApp messages.
- Webhooks: tkana sends an instant notice to a link in your system when something happens, such as a new customer, a new message, a ticket that changes status, or a cancelled booking.
You create keys and webhooks in Settings > API keys. The same API key also lets an AI assistant such as Claude work on your account: see Use tkana from Claude and other AI assistants (MCP).
What you can build
Section titled “What you can build”Here are common ways businesses use the API and webhooks. Each one only uses what your key’s permissions allow.
Segment customers for marketing from their conversations
Section titled “Segment customers for marketing from their conversations”Goal: send campaigns to the right people, for example customers who asked about a product or were unhappy with delivery.
How it works: when a conversation is summarized, tkana notifies your system. Your system reads the summary (the customer’s issue, contact reasons, and sentiment), decides which tags apply, and updates the customer’s tags or stores extra details on the customer. In the portal, you then turn a tag into a smart group and send it a campaign. See Organize customers with tags and groups.
Capture leads from your forms and know where they came from
Section titled “Capture leads from your forms and know where they came from”Goal: every lead from your website or a landing page lands in tkana, marked with where it came from, and gets a WhatsApp welcome right away.
How it works: when someone submits your form, your system creates the customer in tkana by phone number, or updates them if they already exist. It adds a tag for the source, such as “website form” or the campaign name, and can store extra form answers on the customer. Your system can then send an approved WhatsApp template to welcome them. When the customer replies, your agent takes over the conversation. Each conversation also records the channel it came on, such as WhatsApp or the website chat, so your reports can split leads by channel.
See Sending messages in the developer documentation.
Take bookings in your own system
Section titled “Take bookings in your own system”Goal: your website, app, or ERP books appointments against the same services and schedules your agent uses, and stays in sync.
How it works: your system lists your services, the staff or resources that provide each one, and their open slots, then creates the booking in tkana for the chosen slot. It can also reschedule a booking or change its status, for example to confirmed or cancelled. In the other direction, tkana notifies your system whenever a booking is created, confirmed, rescheduled, cancelled, completed, or marked as a no-show, including bookings your agent made in a conversation, so your calendar or ERP always matches.
For how bookings and availability work in tkana, see How available times are calculated.
Send tickets to your helpdesk or CRM
Section titled “Send tickets to your helpdesk or CRM”Goal: your team keeps working in the helpdesk or CRM it already uses, while your agent opens tickets from conversations.
How it works: when a ticket is created in tkana, your system receives it and creates a matching ticket in your tool. When your team updates it there, your system changes the ticket’s status in tkana or adds a comment, so the ticket history stays complete on both sides. Your system can also open tickets in tkana, for example from a phone call.
Send order and shipping updates from your own backend
Section titled “Send order and shipping updates from your own backend”Goal: customers get “order confirmed” or “out for delivery” messages on WhatsApp from your own store or delivery system.
How it works: when an order changes in your system, it asks tkana to send a WhatsApp message to the customer. An approved template can be sent at any time; a free-text message only while the customer’s 24-hour window is open, meaning they wrote to you in the last 24 hours. Your system can then check whether the message was delivered and read. When the customer replies, the reply lands in their conversation and your agent can help.
Meta charges template messages to the payment method on your own Meta account, not to your tkana credits. See Who pays for WhatsApp template messages.
Alert your team when a conversation needs them
Section titled “Alert your team when a conversation needs them”Goal: the right person hears about an escalation straight away, in the tool they watch.
How it works: when your agent escalates a conversation to a human, tkana notifies your system, which posts an alert to your team’s chat, pager, or on-call tool with a link to the conversation.
Add conversation history to your CRM
Section titled “Add conversation history to your CRM”Goal: your sales or account team sees what each customer discussed with your agent, inside the CRM.
How it works: when a conversation is resolved or summarized, your system reads its summary (issue, resolution, sentiment, and next steps) and, if needed, its messages, and adds them to the customer’s record in your CRM. Store your CRM’s record ID on the tkana customer so the two always match.
Build your own reports
Section titled “Build your own reports”Goal: analyze conversations, tickets, and bookings in your business intelligence tool, next to your sales data.
How it works: your system regularly asks tkana for everything that changed since its last sync, and adds it to your data warehouse or spreadsheet. See Pagination in the developer documentation for how to sync changes efficiently.
Create an API key
Section titled “Create an API key”-
In Settings, open API keys.
-
Click Create key and give it a name that explains what it is for, such as the name of the system that will use it.
-
Under Permissions, choose what the key can do in each area: Read, Write, or Delete. Write also allows read.
-
Set Expiry (optional) if you want the key to stop working on a specific date.
-
Confirm, then copy the key right away.
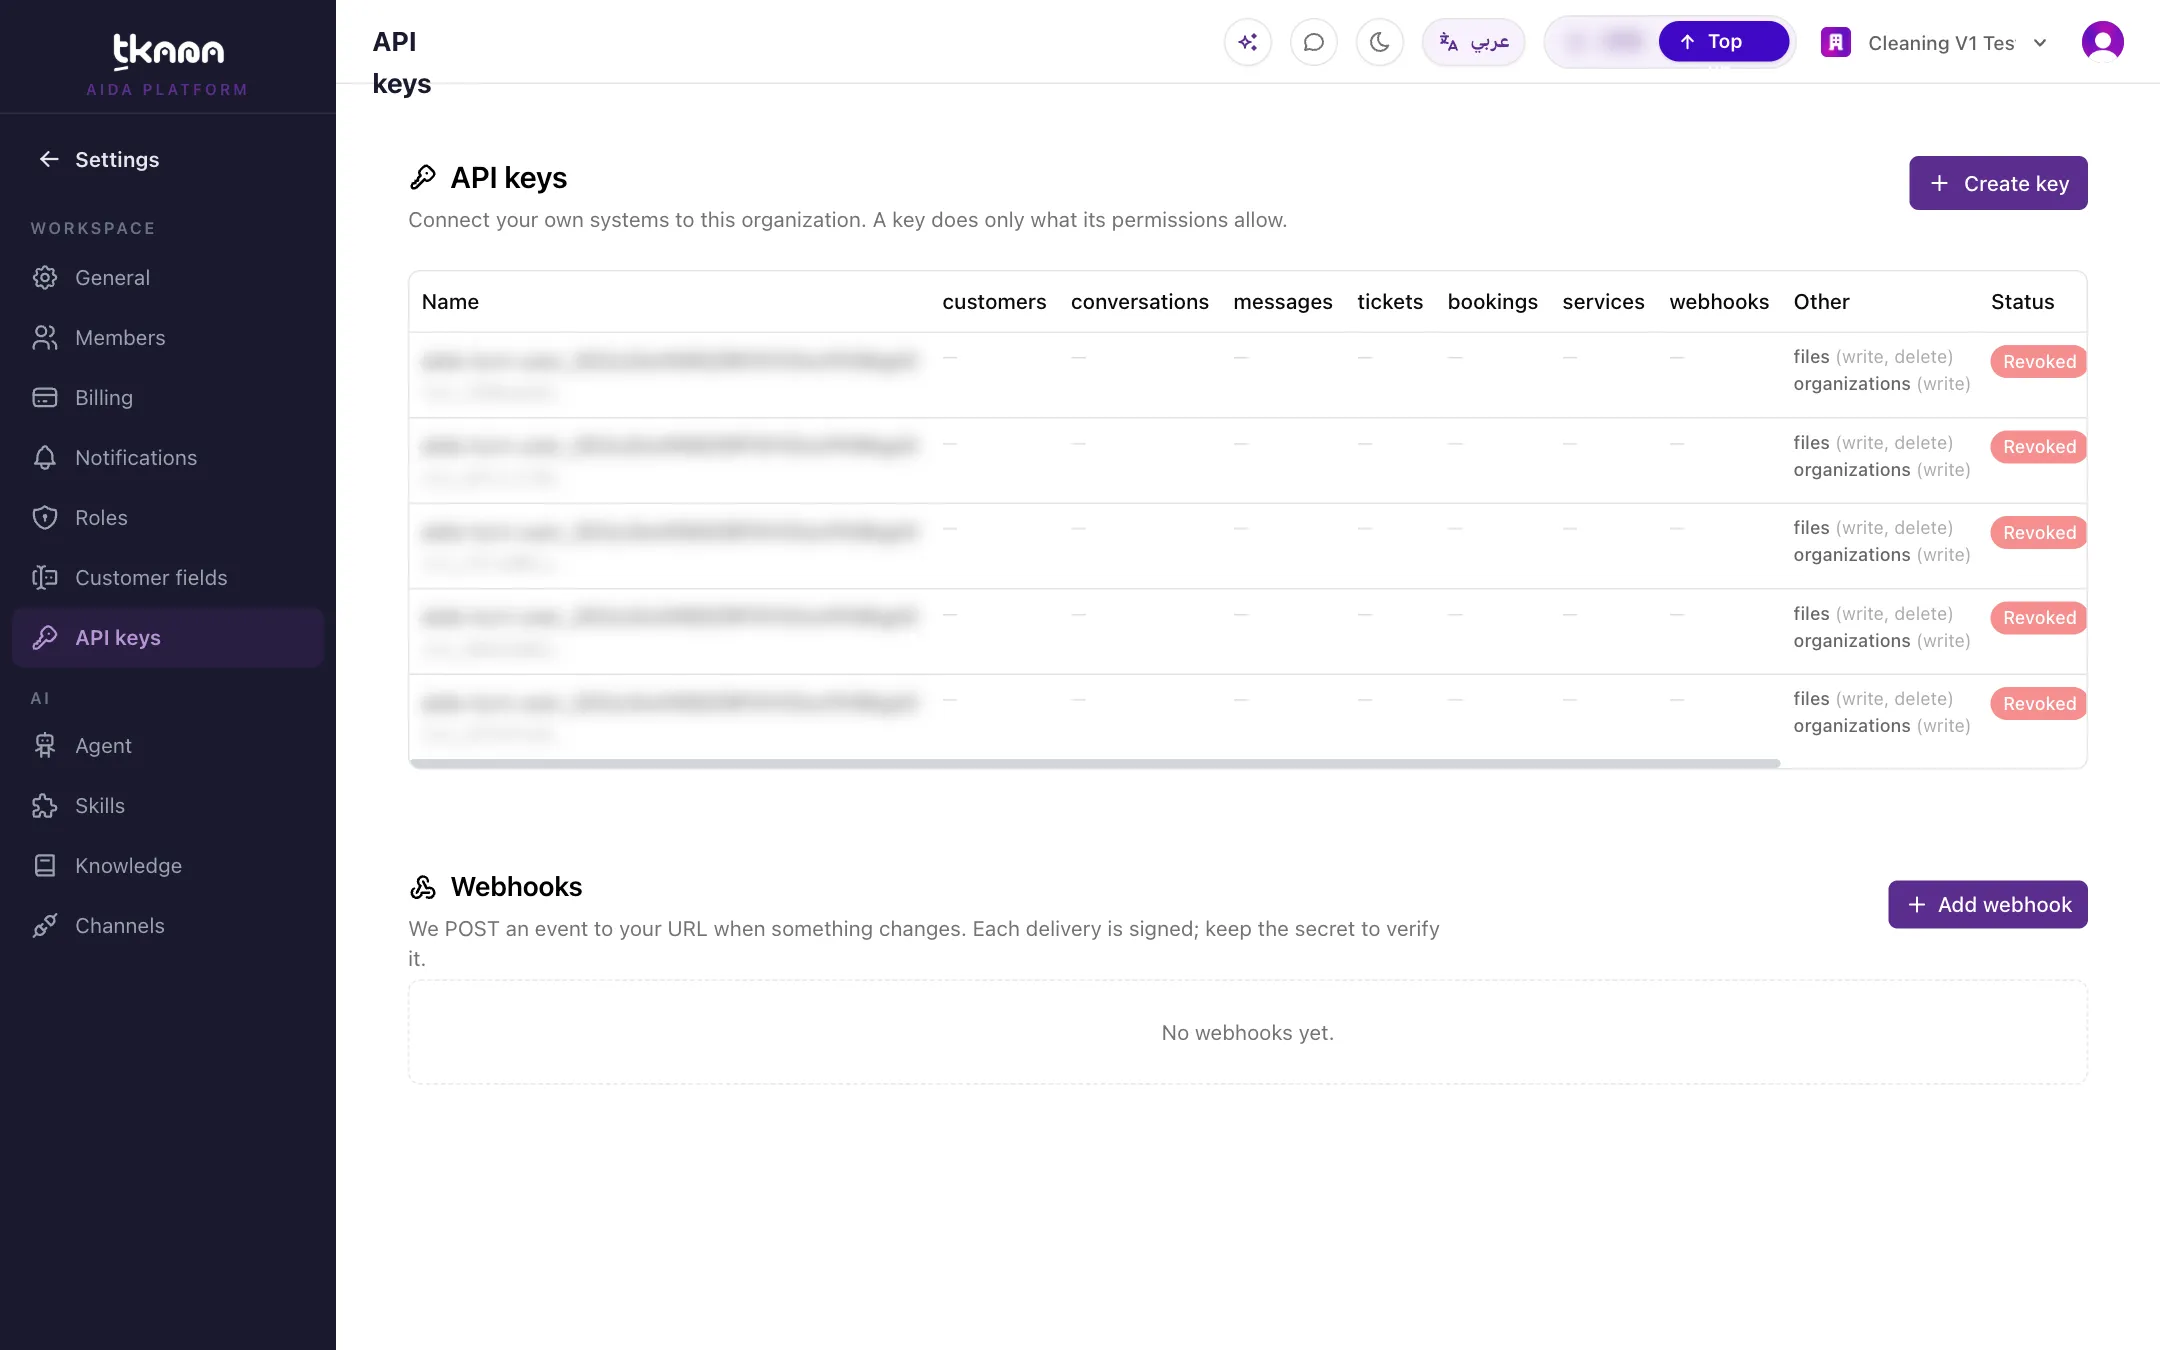
Manage your keys
Section titled “Manage your keys”The keys table shows each key’s name, permissions, expiry, and Last used date, so you can tell which keys are still in use.
- Edit permissions: changes what the key can do without changing the key itself.
- Revoke key: anything using the key stops working immediately, and this cannot be undone. To restore access you will need to create a new key.
Add a webhook
Section titled “Add a webhook”-
On the same page, go to the Webhooks section and click Add webhook.
-
Enter your system’s URL. It must start with
httpsand be reachable from the internet. -
Choose the events you want to receive, at least one. They cover customers, conversations, messages, tickets, and bookings, such as a ticket being created or changing status, or a booking being confirmed or cancelled.
-
Add a description if you like, then confirm.
-
Copy the signing secret that appears. It is shown only once, and your system uses it to check that each delivery really comes from tkana.
Every delivery to your URL is signed with this secret, so keep it in your system.
Track deliveries
Section titled “Track deliveries”Open the webhook’s Delivery log to see each delivery, when it happened, its result and your system’s response, and the payload that was sent. If a delivery fails, tkana retries automatically and the log shows when the next attempt is due.
To delete a webhook, use the remove option and confirm. tkana stops sending to that URL, and its signing secret and delivery history are deleted with it.
Was this article helpful?
Thanks for the feedback, it helps us improve these guides.